
One of the most important and unique features is the Morpheus Training Methods.
These 12 methods represents a highly effective way to improve your conditioning and fitness from the inside out.
What are the Morpheus Training Methods?
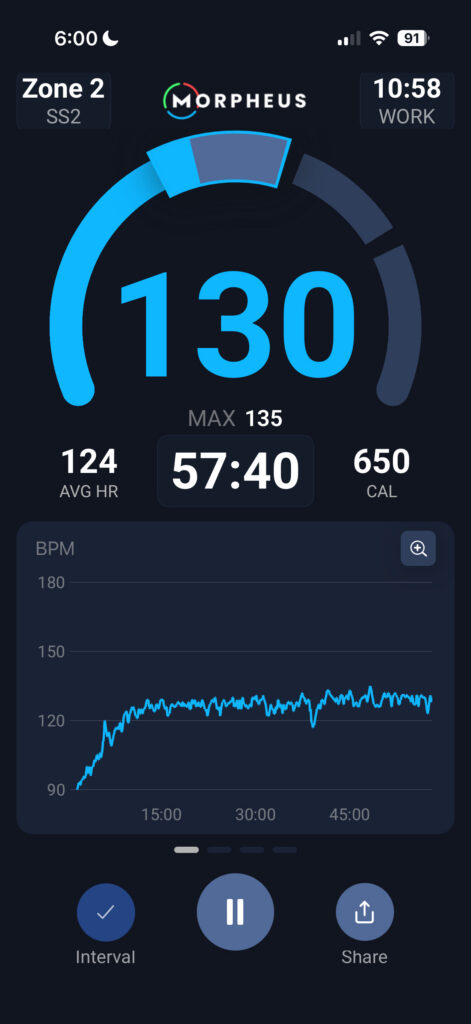
Over the last few years, high-intensity interval training (HIIT) has become hugely popular and a part of a wide variety of training programs.
On one hand, training at high intensity is a powerful tool that can drive fitness forward. On the other hand, high intensity places a tremendous amount of stress on the body and too much of it can lead to fatigue, overtraining, and even increase the risk of injury.
The purpose of the Morpheus training methods is to unlock the potential of using interval training, while avoiding the potential pitfalls of too much intensity. The way it does this is incorporating a much wider range of intensities—for both the work and the rest part of the interval.
That’s done through the use of the Morpheus heart rate zones.
Although the biggest thing that made the use of heart rate zones popular is the idea that there is a special fat burning zone (there isn’t), the real benefit is that different zones represent different levels of intensity.
Using zones to drive both the intensity of how hard to work and rest has a ton of benefits when compared to standard HIIT:
- Can target different parts of the body’s energy systems more effectively
- Allows for higher training volumes and frequencies without overtraining
- Develops better control of energy management and pacing
- Helps prevent the development of poor technique that comes with fatigue
- Is more specific to sport performance
- Offers greater variety and is more fun to do
- Produces better results over the long-term instead of leading to plateaus
How to train with the Morpheus Training Methods
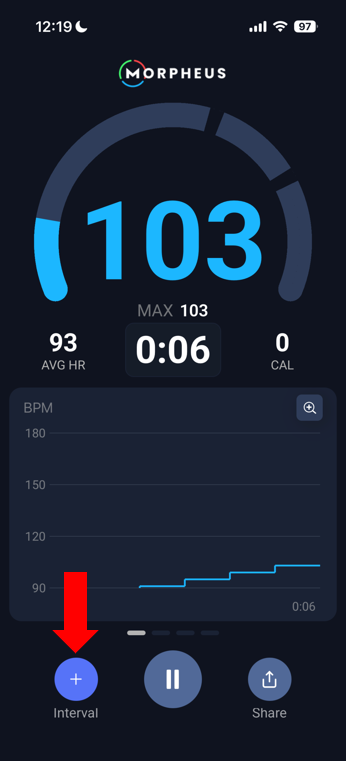
To access this feature, tap on the + interval button in the bottom left corner of the train screen.
It appears after you connect your heart rate monitor. You can set up an interval either before or after you officially start your workout.
Once you tap on the feature by clicking on the stopwatch, it will bring up a screen to select from 12 different zone-based interval methods. The methods are categorized into overall level of intensity from blue (low), to green (moderate), up to red (high).
You can access each of these categories by tapping on the Low, Moderate, or High tabs at the top of the intervals menu.
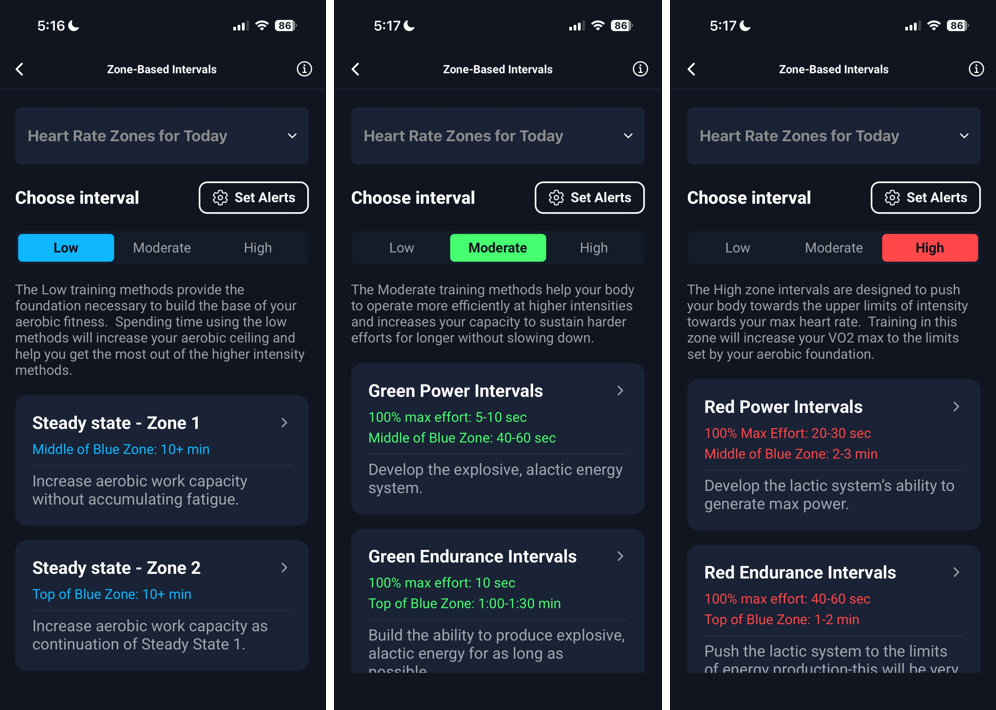
You can also find information about how to perform each of the 12 intervals by clicking here.
Configuring Audio Alerts
You can set a range of audible alerts to help keep you on target and in the correct zone or range.
There are 5 different audio alerts that you can set for each type of interval.
You can choose to have any of these turned on or off. Any that you select to have turned on will apply to all of the 12 interval methods.
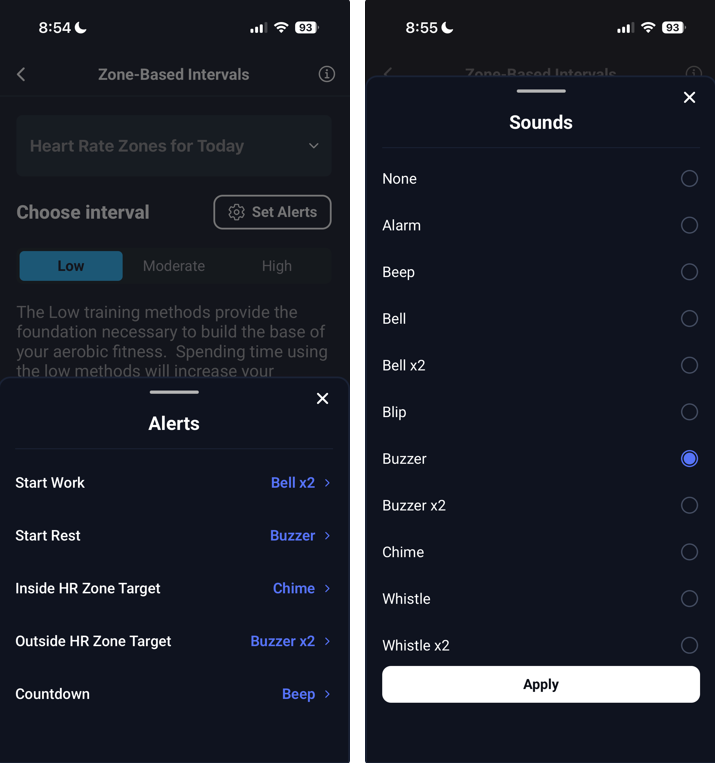
- Start Work – this alert plays when it’s time to start the “work” phase of a rep
- Start Rest – this alert plays when it’s time to start the “rest” phase of a rep
- Inside HR Zone Target – this alert plays when you have entered the target HR Zone area for either work time or rest time of any rep.
- Outside HR Zone Target – this alert plays when you go outside of the target HR zone area (above or below) for at least 3 consecutive seconds. This is a prompt to get your HR back into the target area.
- Countdown – this alert plays 3 times during the final 3 seconds of any work or rest phase of a rep. For example, if you choose “Beep” for this alert, you will hear a beep at 3 seconds, 2 seconds, and 1 second remaining in any work or rest phase. Then following the countdown either the “Start Work” or “Start Rest” alert will play.
Configuring Settings
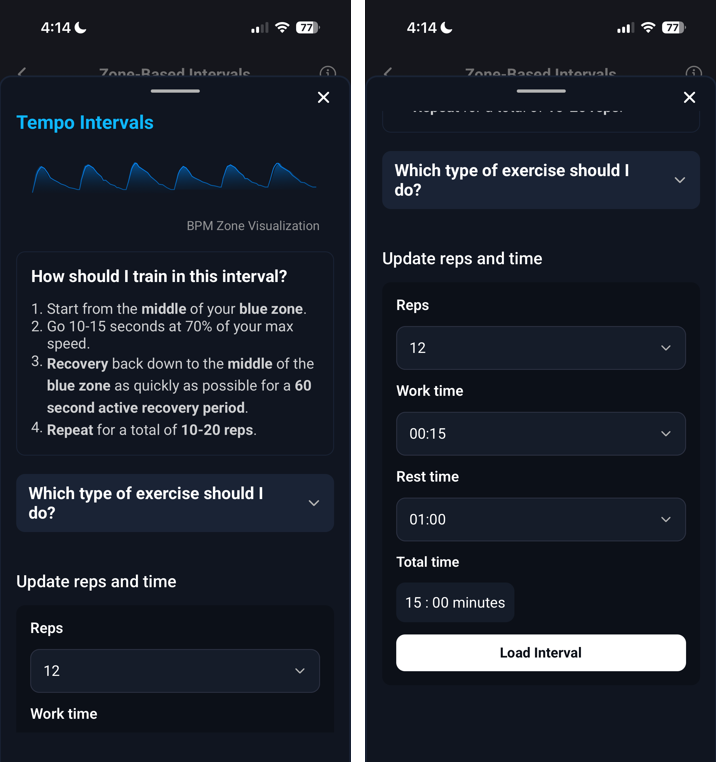
At the top of the screen for each training method, there is a graph example and explains the goal of the intervals, how to complete them, and exercise recommendations.
Each training method has different presets for reps, work time, and rest time that you can edit (within certain parameters). The ranges for each of these depends on the type of interval that you’ve selected and is designed to make sure the intervals are as effective as possible.
When you change these settings you will be able to see the total duration of your interval session.
If you’ve performed a particular interval in a previous workout, it will remember your last saved settings.
Once you’ve configured your chosen interval, tap the Load Interval button at the bottom of the screen.
This will load the intervals into your workout so you can start them at any point during your workout.
Starting a training method
Once you’ve saved your selected training method and returned to the workout screen, you can choose to start the interval session at any time by tapping the Start button where the +Interval button was before you set up the interval.
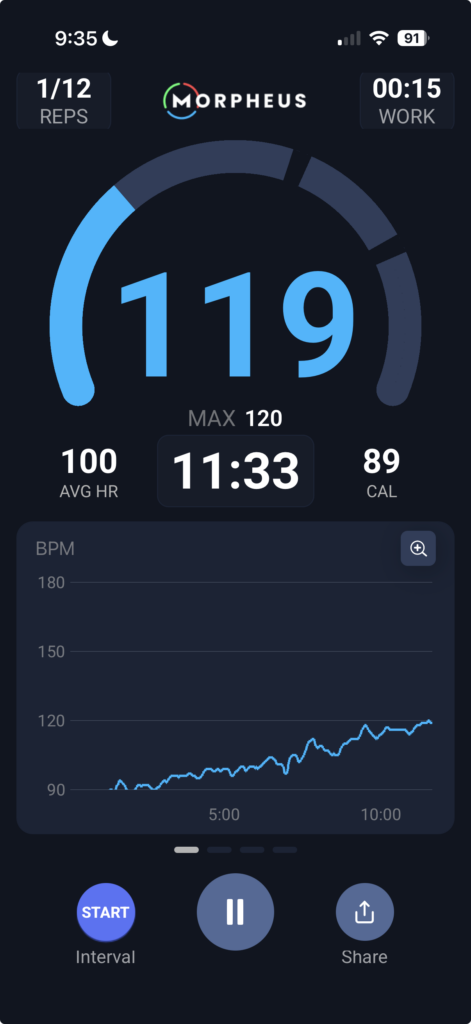
Note: If you have not yet started your main workout, you must tap the Play button at the bottom-center of the screen before you can press Start for the interval.
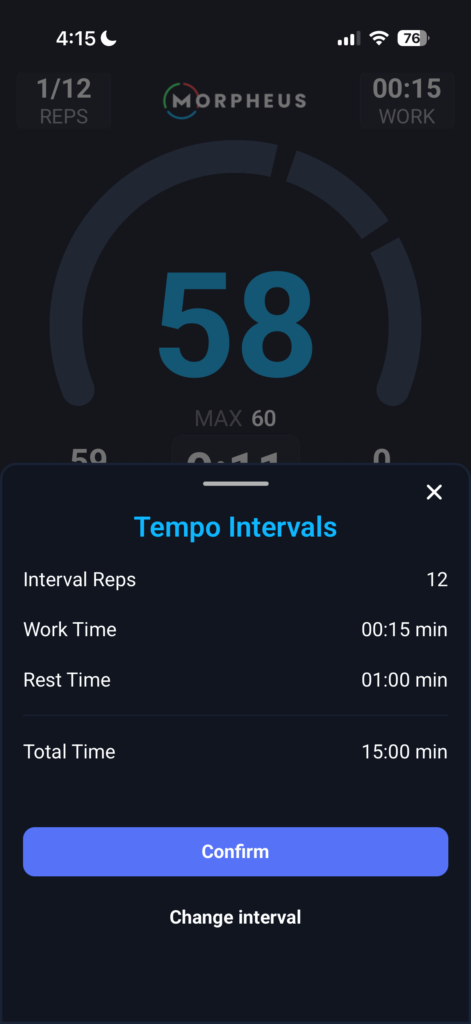
This will bring up a summary of the intervals you’ve saved and allow you to get started by tapping the Confirm button.
If you need to make any changes before starting tap the Change Interval button to do so.
Aside from Steady State 1 (SS1) and Steady State 2 (SS2), each interval includes a target heart rate zone for both the work period, and the rest period.
While most intervals treat the rest period as simply a break from the work, with zone-based intervals, the rest period is designed to be active. This helps speed up the recovery in between work periods and develops conditioning more effectively.
Because of this, each rep is not complete until you’ve done both the work and the active rest phase of the interval.
As you progress through each rep, you’ll see the target heart rate zone move during each phase of the interval, while the time in the upper left counts down.
The number of reps you’ve done and have left to complete is shown in the upper right hand corner of the screen.
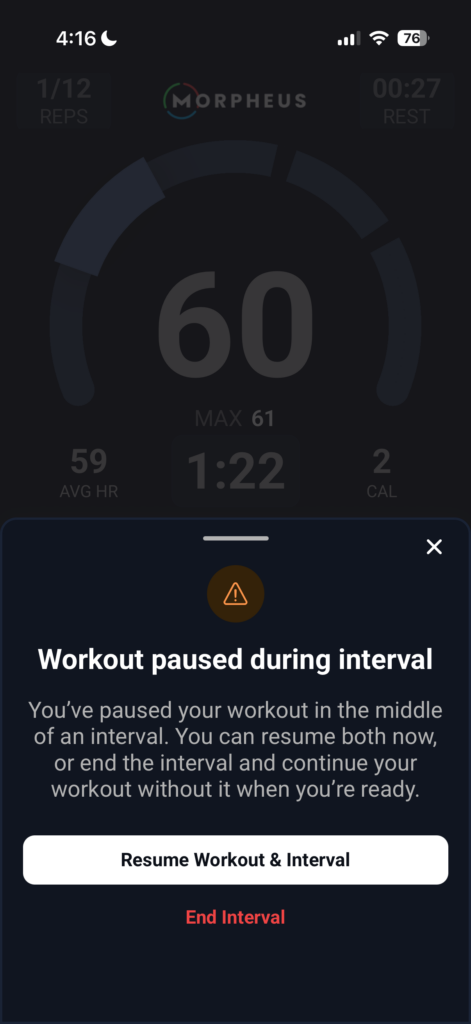
You can pause the workout (and the intervals) at any time by pressing the blue pause button.
Once paused, you can choose to return to the intervals, or end them before completing the set number of reps.
As soon as you’ve completed the set number of interval reps, Morpheus automatically goes back to the standard training screen.
If you choose to continue with the workout, you can select another round of intervals or simply continue your workout on the standard training screen.
Getting started with Morpheus training methods
One of the most powerful features of the Morpheus training methods is their versatility.
No matter what your current level of fitness is, or what your goals may be, there are methods that can help you improve your fitness and conditioning.
If you’re just getting started with Morpheus, start by trying out each of the blue intervals before progressing to higher intensities.
It’s also recommended to begin with the lower end of the guidelines for work time and number of reps, while at the top end of the rest time.
As you make progress from week to week, you can gradually add work time, increase the number of reps, and decrease your rest phase.
For some general guidelines of how much time you should spend in the Morpheus zones, make sure to check out this article.